Setting up SSH on your Raspberry Pi (RPI) is an essential step for remote access and efficient management of your device. Whether you're a beginner or an advanced user, understanding how to configure SSH properly ensures secure and reliable communication with your RPI. This guide will walk you through everything you need to know about RPI SSH setup, including step-by-step instructions and best practices.
Raspberry Pi (RPI) has become one of the most popular single-board computers worldwide, thanks to its affordability and versatility. One of the most powerful features of RPI is its ability to allow remote access through SSH (Secure Shell). SSH provides a secure way to manage your RPI without needing physical access, making it indispensable for developers, hobbyists, and professionals alike.
Throughout this article, we'll delve into the details of RPI SSH setup, covering everything from enabling SSH to securing your connection and troubleshooting common issues. By the end, you'll have all the knowledge you need to confidently set up and use SSH on your Raspberry Pi.
Read also:Is Dez Bryant Retired Unveiling The Truth About Dez Bryants Career
Table of Contents
- Introduction to SSH
- RPI SSH Basics
- Enabling SSH on RPI
- Connecting to RPI via SSH
- Securing Your SSH Connection
- Advanced SSH Configuration
- Common Issues and Troubleshooting
- SSH on Different Operating Systems
- Best Practices for RPI SSH
- Conclusion and Next Steps
Introduction to SSH
SSH, or Secure Shell, is a cryptographic network protocol that allows users to securely access and manage remote devices. It provides encryption for data transmission, ensuring that sensitive information remains private and secure during communication. SSH is widely used in various fields, from web development to network administration.
For Raspberry Pi users, SSH is a critical tool for managing their devices remotely. Whether you're setting up a home server, running a media center, or developing IoT applications, SSH enables you to interact with your RPI from anywhere in the world.
RPI SSH Basics
Raspberry Pi SSH setup involves several key steps, starting with enabling SSH on your device and configuring it for secure communication. Below are some fundamental concepts to understand:
- SSH Client: A software application used to connect to an SSH server. Examples include PuTTY (Windows) and Terminal (macOS/Linux).
- SSH Server: The software running on your Raspberry Pi that listens for incoming SSH connections.
- SSH Keys: A pair of cryptographic keys (public and private) used for authentication, enhancing security by eliminating the need for passwords.
Why Use SSH on Raspberry Pi?
SSH offers numerous advantages for Raspberry Pi users:
- Remote access without needing physical access to the device.
- Secure communication through encryption.
- Automation of tasks via scripts and commands.
Enabling SSH on RPI
Enabling SSH on your Raspberry Pi is straightforward and can be done in multiple ways. Below are the steps for enabling SSH on RPI:
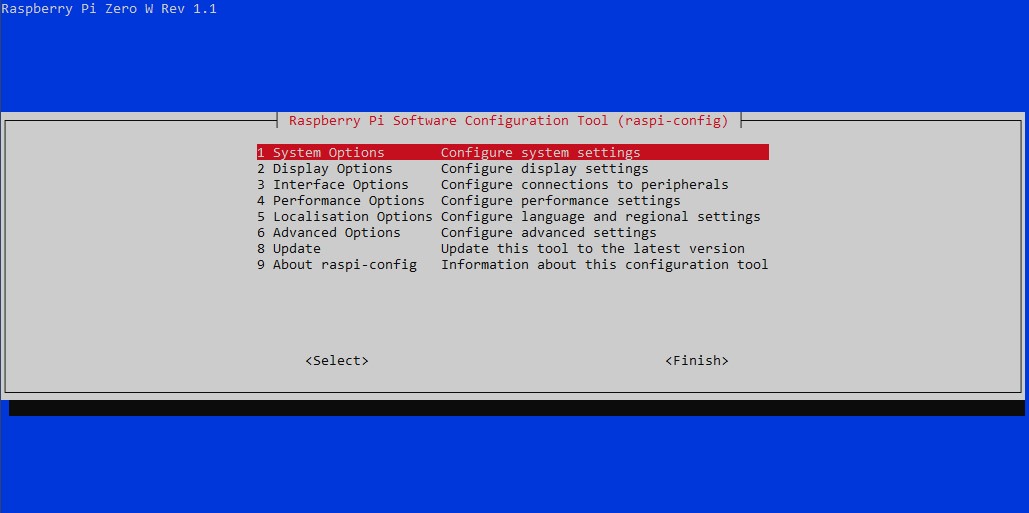
Method 1: Using the Raspberry Pi Configuration Tool
- Open the Raspberry Pi Configuration tool by typing
sudo raspi-configin the terminal. - Select
Interfacing Options. - Choose
SSHand enable it. - Reboot your Raspberry Pi for the changes to take effect.
Method 2: Creating an SSH File
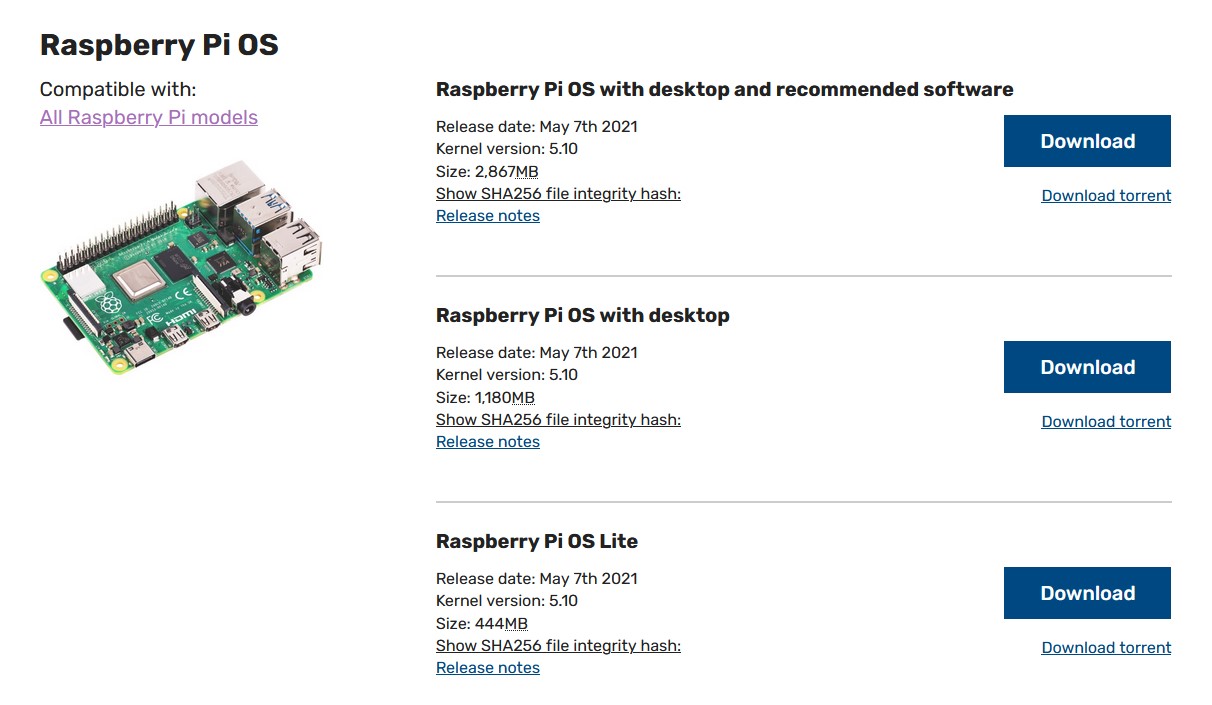
If you don't have access to the RPI's graphical interface, you can enable SSH by creating an empty file named ssh in the boot partition of your SD card.
Read also:Monsters Inc Salamander A Comprehensive Dive Into The Iconic Character
- Insert the SD card into your computer.
- Locate the boot partition and create a new file named
ssh(no extension). - Insert the SD card back into your Raspberry Pi and boot it up.
Connecting to RPI via SSH
Once SSH is enabled, you can connect to your Raspberry Pi from another device. Below are the steps for connecting to RPI via SSH:
Step 1: Find the IP Address of Your Raspberry Pi
Use the following command in the terminal to find your RPI's IP address:
hostname -I
Step 2: Connect Using an SSH Client
For macOS/Linux users, open the terminal and type:
ssh pi@
For Windows users, you can use PuTTY or the built-in SSH client in newer versions of Windows.
Securing Your SSH Connection
Security is paramount when using SSH. Here are some tips to secure your RPI SSH connection:
1. Change the Default SSH Port
Changing the default SSH port (22) can help prevent brute-force attacks. Edit the SSH configuration file:
sudo nano /etc/ssh/sshd_config
Locate the line Port 22 and change it to a different number (e.g., 2222). Restart the SSH service:
sudo systemctl restart ssh
2. Use SSH Keys Instead of Passwords
Generate SSH keys on your client machine:
ssh-keygen -t rsa -b 4096
Copy the public key to your RPI:
ssh-copy-id pi@
Disable password authentication in the SSH configuration file:
PasswordAuthentication no
Advanced SSH Configuration
Advanced users can customize their SSH setup for enhanced functionality. Here are some advanced configurations:
1. Set Up SSH Tunneling
SSH tunneling allows you to securely forward traffic between your local machine and RPI. Use the following command:
ssh -L
2. Enable Two-Factor Authentication
For added security, you can enable two-factor authentication (2FA) using tools like Google Authenticator.
Common Issues and Troubleshooting
Here are some common issues you might encounter during RPI SSH setup and their solutions:
Issue 1: Unable to Connect to SSH
Solution: Ensure that SSH is enabled and the IP address is correct. Check your firewall settings and verify that the SSH port is open.
Issue 2: Permission Denied (Public Key)
Solution: Double-check that your public key has been correctly added to the ~/.ssh/authorized_keys file on your RPI.
SSH on Different Operating Systems
While the basic principles of SSH remain the same across operating systems, the tools and methods may vary. Below are some tips for using SSH on different platforms:
macOS/Linux
Both macOS and Linux come with built-in SSH clients. Simply open the terminal and use the ssh command to connect to your RPI.
Windows
Windows 10 and later versions include an SSH client. Alternatively, you can use third-party tools like PuTTY for a more user-friendly interface.
Best Practices for RPI SSH
Follow these best practices to ensure a secure and efficient RPI SSH setup:
- Regularly update your RPI's operating system and software.
- Use strong, unique passwords and SSH keys.
- Monitor SSH logs for suspicious activity.
- Limit SSH access to trusted IP addresses if possible.
Conclusion and Next Steps
RPI SSH setup is a fundamental skill for anyone working with Raspberry Pi. By following the steps outlined in this guide, you can securely configure SSH on your device and take full advantage of its remote management capabilities. Remember to adhere to best practices and continuously update your knowledge as new security measures emerge.
We encourage you to share this article with fellow Raspberry Pi enthusiasts and leave a comment below if you have any questions or suggestions. For more in-depth guides and tutorials, explore our other articles on Raspberry Pi and related technologies.